SPEC Stage 4 Clutch and SLP Steel Flywheel Install

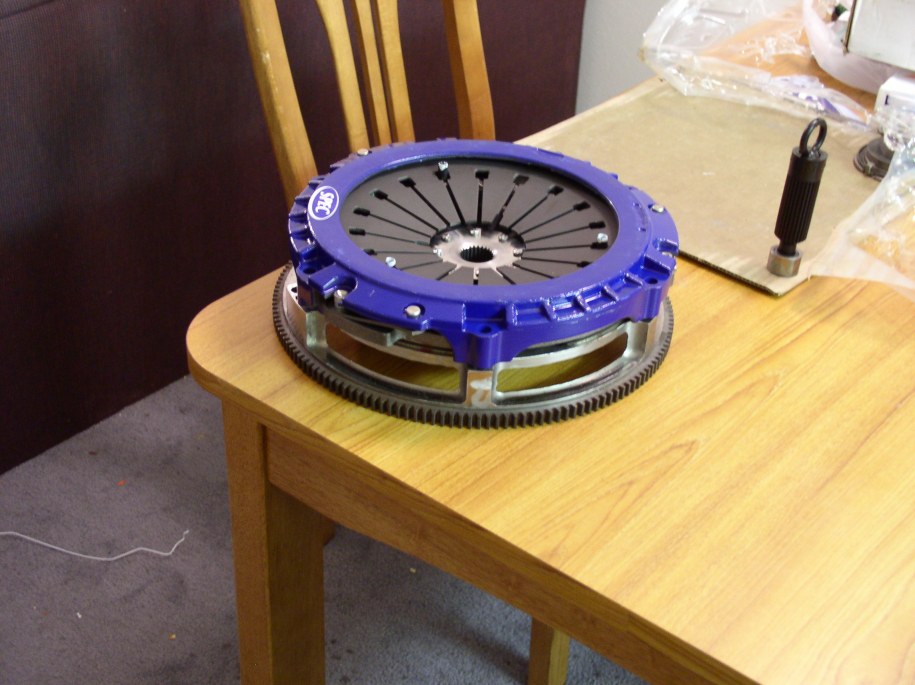
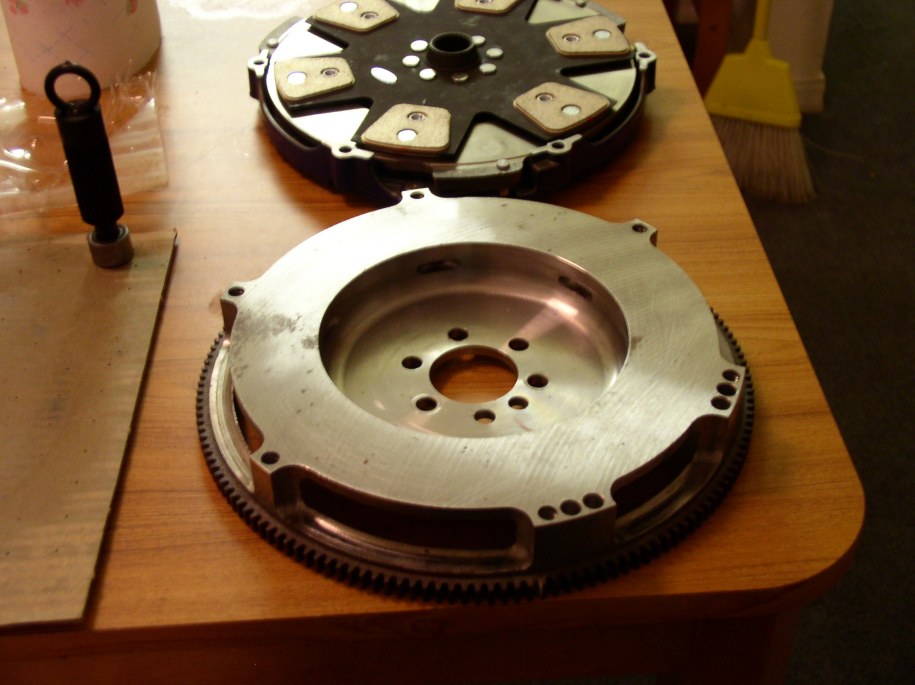
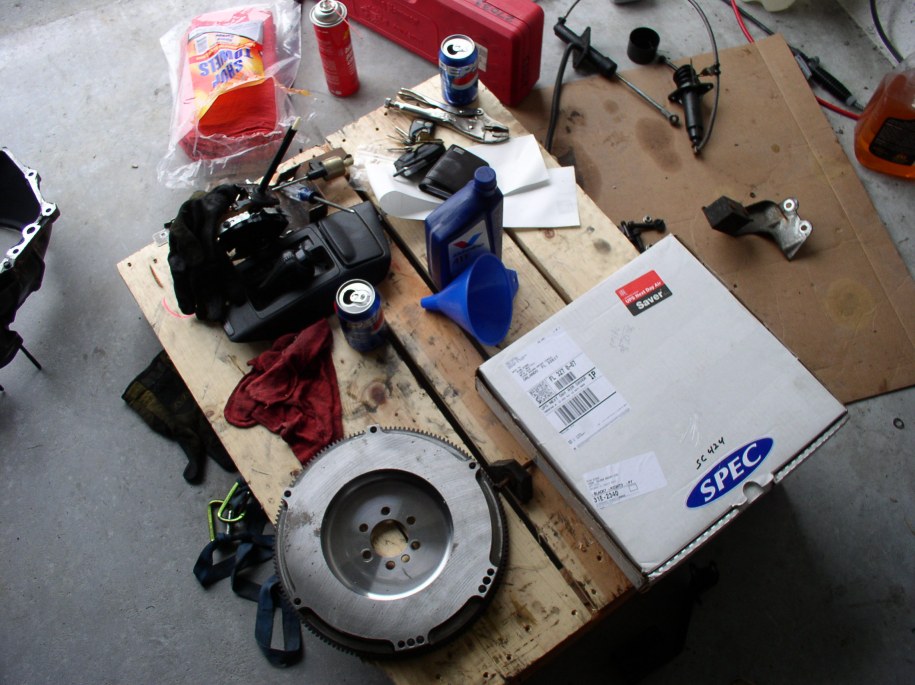
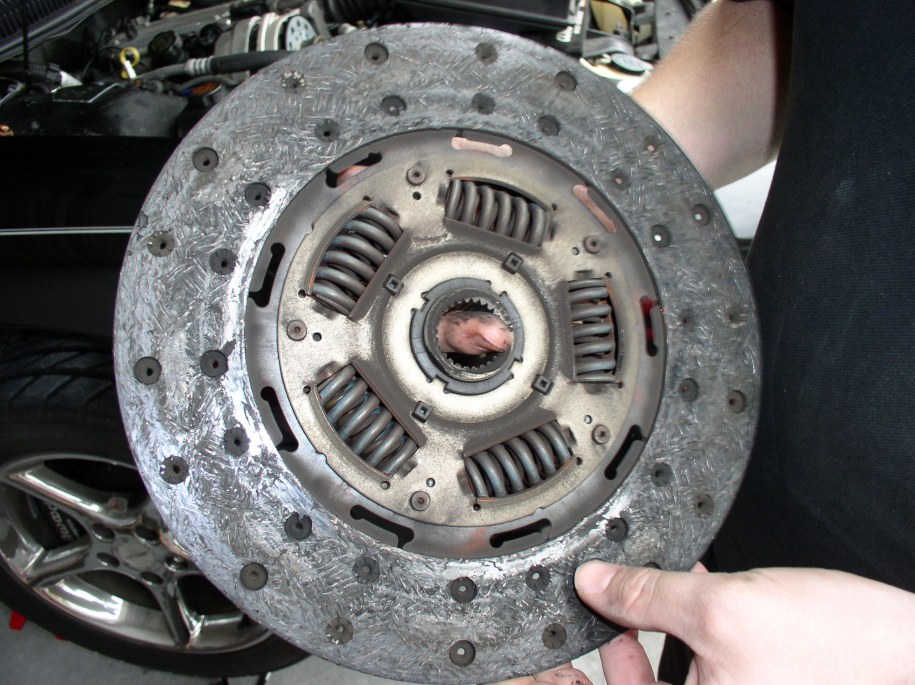
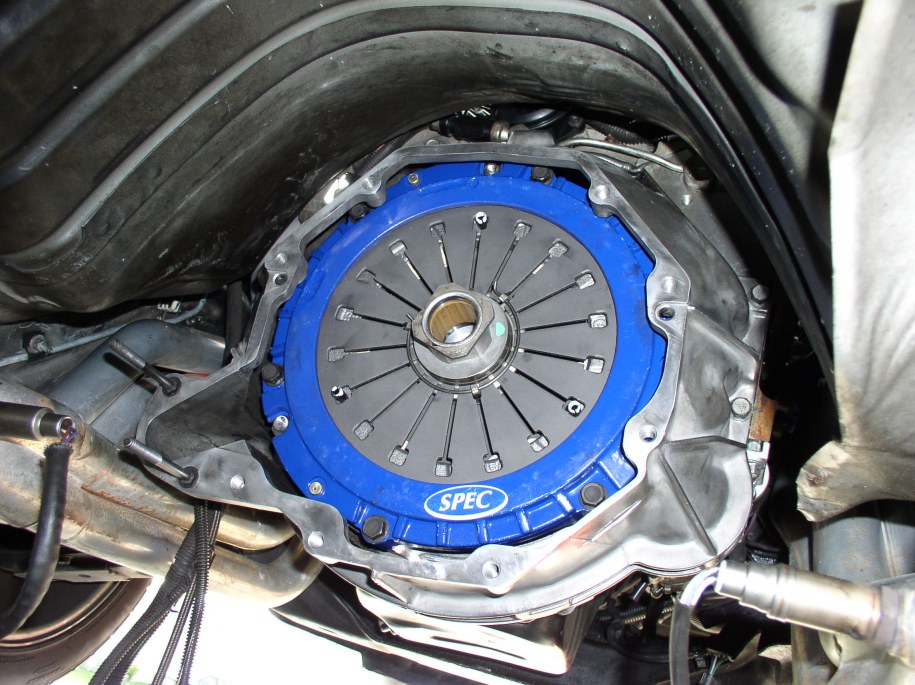
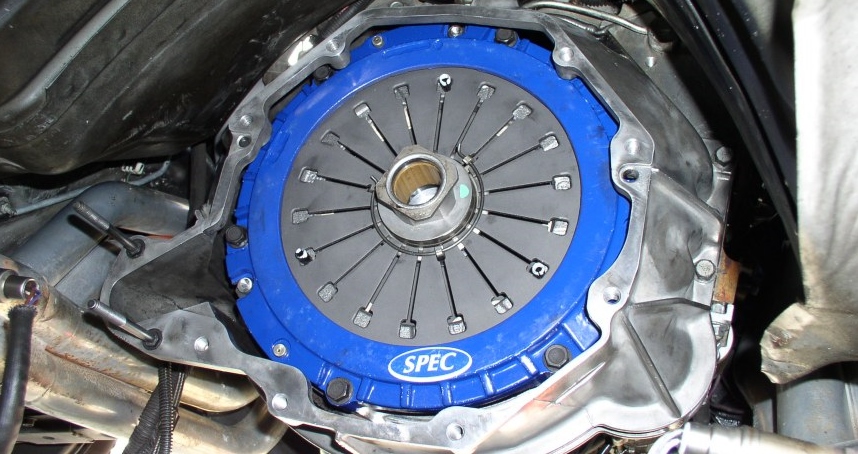
The SPEC Stage IV clutch sitting on top of the SLP flywheel just after it was received. The clutch alignment tool is seen in the background with the pilot bearing that SPEC provides on it. Also included is the SPEC (LT4) throwout bearing.

The SPEC Stage IV clutch and SLP flywheel

The SPEC pressure plate and SPEC Stage IV carbon clutch disc sitting on the flywheel and on the pressure plate.

The SPEC pressure plate and SPEC Stage IV carbon clutch disc

The SLP lightweight steel flywheel weighs ~14lbs, which is 7lbs lighter than stock. It is of noticeably different design than the stock flywheel.

The SLP lightweight steel flywheel

The car must first be raised up on 4 jackstands. Two under the axle and two on the front frame is the best configuration. The car only needs to be high enough that the transmission can be rolled out from under the car if you wish to clean it or give yourself more room to work on the bellhousing. Next the center shifter console needs to be taken apart and the shifter removed. Do not forget to leave the shifter in neutral so that it is easier to line up the transmission later.

Preparing for the install

Remove the torque arm by removing the two long bolts through the rear differential housing and sliding the torque arm out of its front mount by the transmission. Remove the torque arm mount from the transmission to make more room to get to other bolts. Remove the driveshaft by unbolting the four bolts on the rear universal joint. You may want to leave it in the transmission to keep fluid from leaking until you are ready to fully remove the transmission.

Removing the torque arm and driveshaft

With the torque arm and driveshaft removed, the transmission tunnel area is very roomy, and there is plenty of room to get to the top transmission bolts with a 2-3 foot extension. Once the transmission is supported by the jack, remove the transmission mounting crossmember.

Not pictured: Remove the slave cylinder by removing the two nuts and then sliding it off of the two studs. Then remove the aluminum spacer/cover. The clutch fork can then be disengaged by placing your thumb into the round depression and pulling outwards from the input shaft. It should come easily, or you can use a flathead screwdriver to get a bit more leverage.

Preparing the transmission for removal

Once all 8 15mm (or SAE equivalent) transmission bolts are removed (start with the top 4) the transmission should be moved back slightly. If it is stuck, check that the clutch fork is disengaged completely, and that all 8 bolts are in fact removed. It must come out very straight initially.

Removing the transmission

The transmission is shown here moved back about an inch or two from the bellhousing. It helps to stabilize it if it is strapped down to the jack. It may be neccesary to raise or lower it to clear your exhaust and to make sure that the top of the transmission clears the tunnel.

Removing the transmission

You can see the transmission resting on the ground free of its jack. It weighs a lot so be careful not to pinch any fingers when removing it from the jack. The new parts are shown here waiting to go in.

Transmission removed

The factory clutch is shown here with and then without the bellhousing. The bellhousing has 6 15mm (or SAE equivalent) bolts holding it to the block. One of these requires a wrench to remove it. Ratcheting box end wrenches are a definite advantage here. The inspection/dust cover must be removed by removing the two bolts that hold it to the back of the bellhousing. The bellhousing should slide right off of its guide dowels.

The factory clutch
The factory clutch

The pressure plate can now be removed. Use something to keep the motor from turning. (We used a prybar stuck through the crank pulley) You will then be able to access the stock flywheel. Mine was heat spotted pretty badly. You can see the removed bellhousing and the clutch disc and pressure plate here.

Removing the pressure plate

The stock clutch disc.

The stock clutch disc

The stock pressure plate was also heat spotted badly. The stock clutch disc was down to the rivets in some spots and was definitely grooving the pressure plate and flywheel badly.

The stock clutch
The stock clutch

The motor completely free of bellhousing and flywheel. You can see the pilot bearing in the rear of the crank. We tried to use a pilot bearing puller with a slide hammer but the puller broke, so we used the wet toilet paper trick instead.

Pilot bearing removal

Use a 3/8" extension and fill the pilot bearing with very wet toilet paper. Compact it with the extension and a hammer. It will seem as if you cannot put any more in, but keep putting more paper in. Eventually the pilot bearing will start to move.

Pilot bearing removal

The pilot bearing removed and the remnants of the toilet paper in the crank. It actually came out in one or two pieces since it was so compacted. You can now install a new pilot bearing using a large socket and an extension and a hammer.

Note the orientation of the pilot bearing you removed and duplicate it.

Pilot bearing removal

The new flywheel is installed and torqued down. Then the clutch disc is installed using the clutch alignment tool. Then put the pressure plate on with the alignment tool still installed and finger thread a couple bolts. Then install all the bolts and torque them to spec in a star pattern. The alignment tool may be difficult to remove at this point but it should come out with a little effort.

New flywheel and clutch installed

The cleaned bellhousing is reattached and torqued down.

Reattaching the bellhousing

For some reason, my setup caused the clutch fork to rub against the pressure plate. This is the damage that it caused. When the motor was started, it would run fine, but when the clutch pedal was depressed to the floor, a terrible noise was heard. Also, while the car was not running, a funny clicking was felt near the bottom of the travel. This was fixed without completely removing the transmission. It was slid back about 6 inches and the clutch fork was unbolted and removed from the transmission.

Problem: Clutch fork rubbing

Here is the clutch fork and its "T mount". You can see where the pressure plate rubbed on the rear of the fork. This was solved by grinding down the area where it was rubbing, and also taking a paper thin bit of material off of the transmission side of the "T mount."

Solution: Grinding down the clutch fork mount